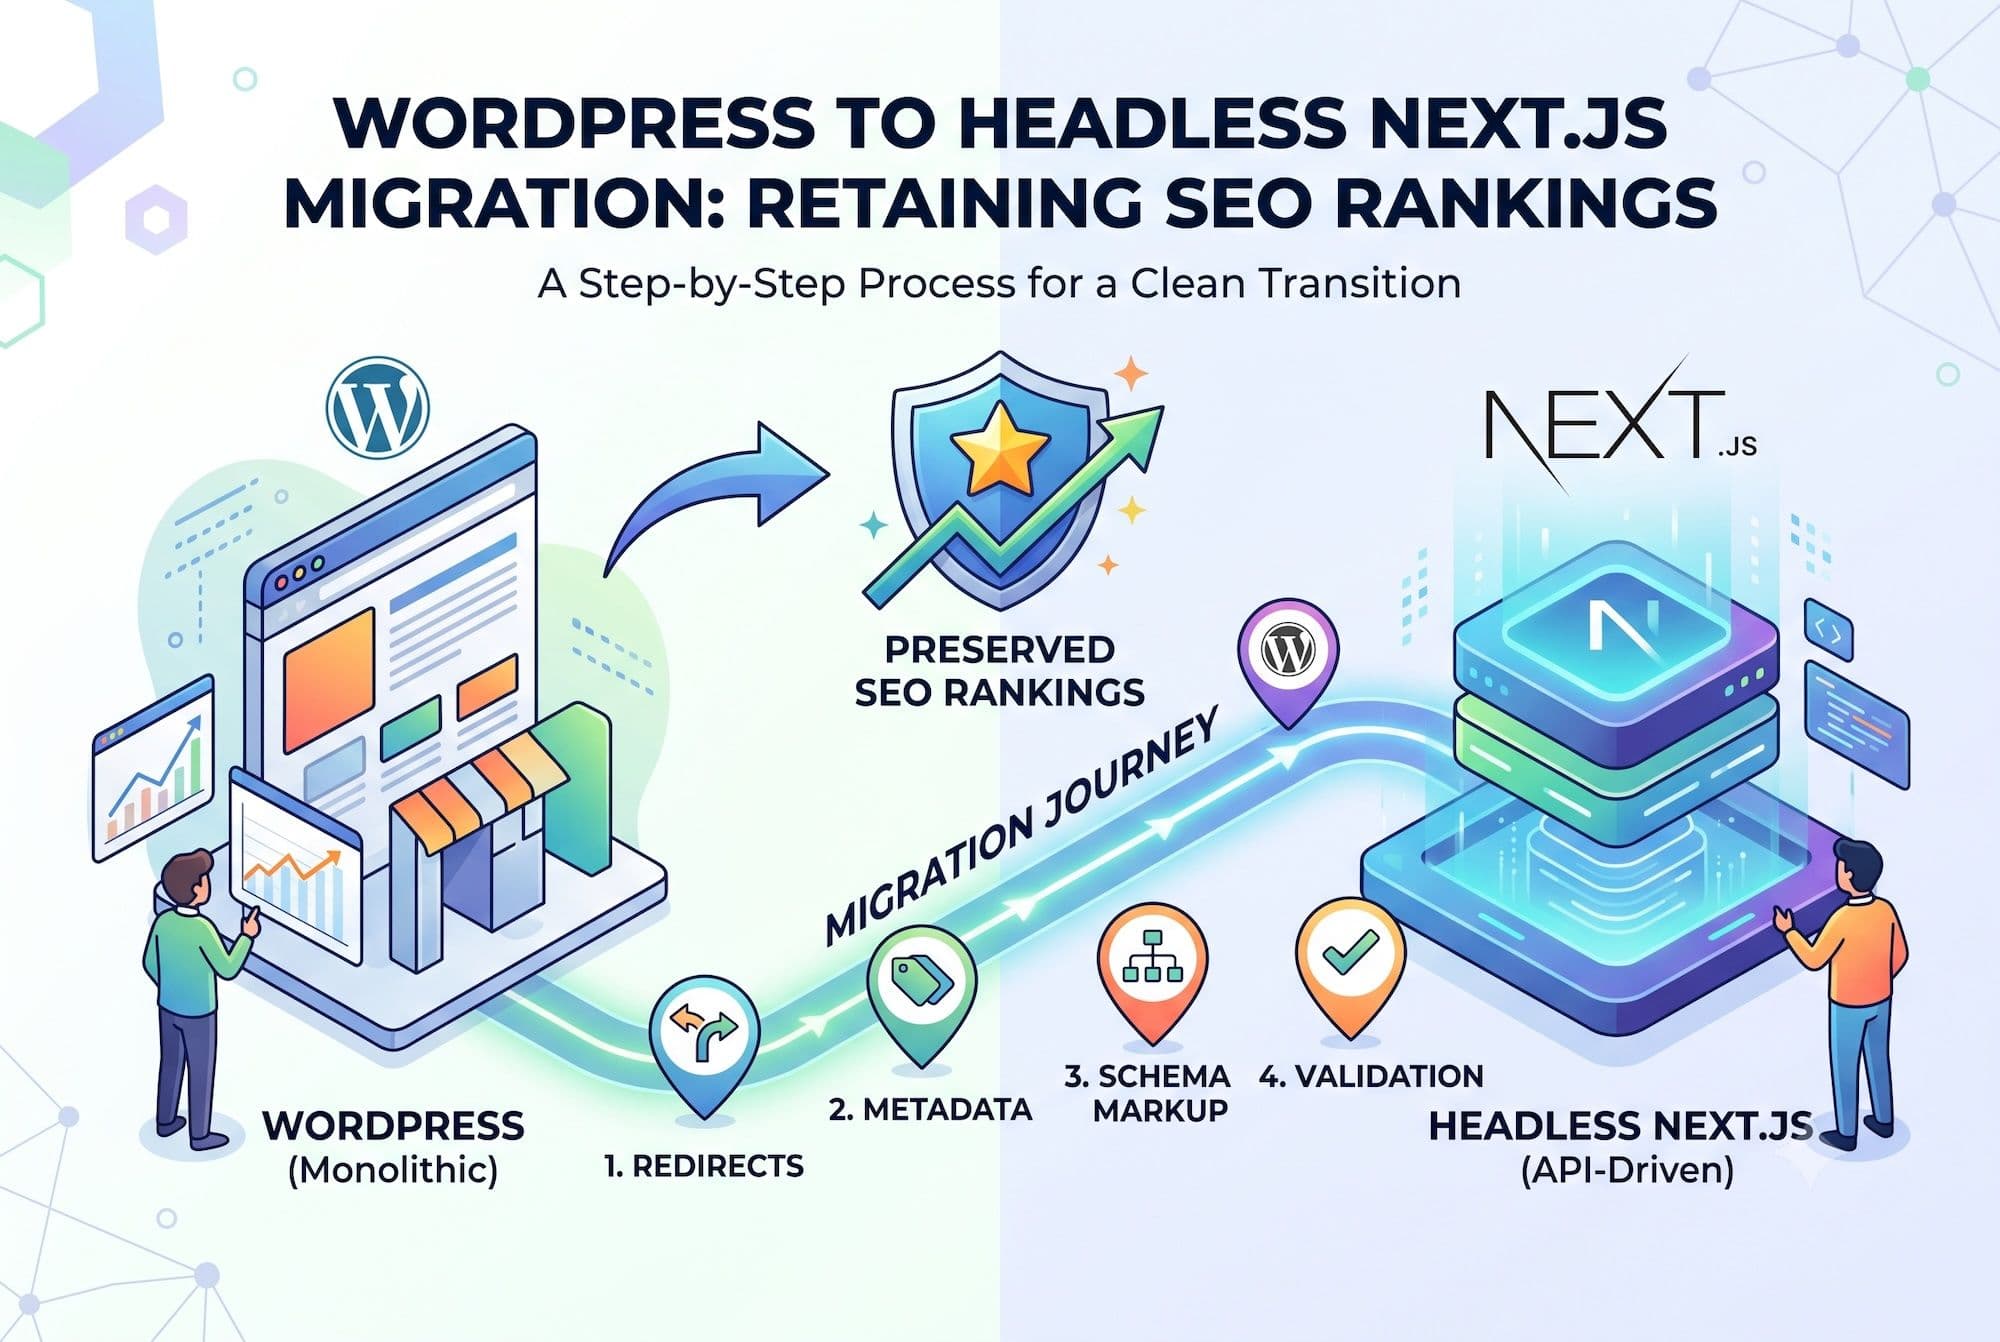
Migrating from traditional WordPress to a headless Next.js frontend can dramatically improve performance — or destroy your organic traffic if done carelessly. Search rankings depend on URL continuity, metadata preservation, and crawlable content. Here's the exact process for migrating without losing what you've built.
Before You Start: Establish Your Baseline
You cannot measure migration impact without pre-migration data. Record:
Full URL inventory — export every indexed URL from Google Search Console (Pages report) and your XML sitemap. This is your redirect map source.
Current rankings — export your top 200 queries with positions and impressions from GSC. You'll compare against this in 30/60/90 days.
Traffic baseline — 90 days of organic sessions, by landing page, from GA4.
Core Web Vitals — current LCP, INP, CLS from the GSC Core Web Vitals report.
Metadata inventory — every page's title, meta description, canonical URL, and schema markup. Export from your SEO plugin.
Step 1: Preserve Your URL Structure
The safest migration keeps every URL identical. If your posts live at `/blog/post-slug/`, they should still live at `/blog/post-slug/` after migration.
In Next.js, configure your dynamic routes to match WordPress permalinks exactly, including trailing slashes (`trailingSlash: true` in next.config.js if WordPress used them).
If URLs must change, map every old URL to its new destination and implement 301 redirects. Never use 302 (temporary) redirects — they don't pass ranking signals. Never redirect everything to the homepage — that's treated as a soft 404 and loses the ranking entirely.
Step 2: Transfer All Metadata
Every SEO field in WordPress must render in your Next.js output:
Expose SEO data via GraphQL. If you use Yoast, install the WPGraphQL for Yoast SEO extension. For RankMath, use the equivalent. This makes titles, descriptions, canonicals, OG tags, and schema available to your frontend.
Render metadata in Next.js. Use the Metadata API (App Router) or next/head (Pages Router) to output every field. Verify with view-source that titles, descriptions, canonicals, and OG tags all appear in the initial HTML — not injected client-side.
Transfer schema markup. Article, Organization, BreadcrumbList, and FAQPage schema must all render server-side. Validate every template in Google's Rich Results Test.
Step 3: Ensure Server-Side Rendering
This is the most critical technical requirement. Content that only appears after client-side JavaScript execution is invisible to AI crawlers and unreliable for search engines.
Use SSG or SSR for all content pages. Static generation (`generateStaticParams` + ISR) is ideal for blog posts and marketing pages. Server-side rendering for genuinely dynamic content.
Audit for client-only content. Any component marked `'use client'` that contains indexable content is a problem. FAQ accordions, tabbed content, and "load more" sections must render their content in the server HTML even if visually collapsed. Use CSS or `<details>` elements for show/hide behavior, not conditional JavaScript rendering.
Verify with curl. Run `curl https://yoursite.com/page` and check that your body content appears in the raw HTML. If you see empty divs or loading placeholders, that content is invisible to crawlers.
Step 4: Rebuild Sitemaps and robots.txt
Your WordPress sitemap plugin won't work headlessly. Generate sitemaps in Next.js:
- Use `next-sitemap` or a custom sitemap route
- Include every indexable URL
- Set correct `lastmod` dates from your content's `dateModified`
- Reference the sitemap in your robots.txt
Ensure robots.txt allows crawling of your frontend and doesn't accidentally block Next.js static assets (`/_next/`). Also confirm AI crawlers (GPTBot, ClaudeBot, PerplexityBot) aren't blocked if you want AI search visibility.
Step 5: Handle Media and Images
Keep media URLs stable where possible. If images move from `/wp-content/uploads/` to a CDN, implement redirects for the old paths.
Preserve alt text. Alt attributes are stored as WordPress attachment metadata — ensure they transfer through your GraphQL queries into your Next.js Image components.
Use Next.js Image optimization for automatic WebP conversion and responsive sizing — this is a performance win, but configure the loader correctly for your WordPress-hosted media.
Step 6: Test in Staging Thoroughly
Before any DNS change:
- Crawl the staging site with Screaming Frog and compare the URL inventory against your baseline export
- Verify every page returns 200 (or the intended 301)
- Check that titles and meta descriptions match the pre-migration inventory
- Validate schema on every template type
- Test Core Web Vitals — the migration should improve them, not regress
- Verify forms, search, and any interactive functionality
- Test on mobile devices, not just desktop emulation
Step 7: Launch and Monitor
Launch during low-traffic hours for your primary audience.
Immediately after launch:
- Submit the new sitemap in Google Search Console
- Use URL Inspection on 10–15 key pages and request indexing
- Verify redirects are firing correctly with a redirect checker
- Monitor server logs for 404s
First 48 hours: Watch GSC Coverage report for crawl errors. Watch GA4 for traffic anomalies by landing page.
First 30 days: Expect some ranking volatility — this is normal during re-crawling. Compare weekly against your baseline. Investigate any page that drops more than 5 positions.
60–90 days: Rankings should stabilize at or above pre-migration levels. Performance improvements from static generation should start showing in Core Web Vitals field data.
Common Migration Mistakes
Forgetting trailing slashes. WordPress typically uses trailing slashes; Next.js doesn't by default. This creates duplicate URLs and redirect chains.
Losing the canonical tags. Without canonicals, you risk duplicate content issues between www/non-www, http/https, and parameter variations.
Client-rendering the content. The single most damaging mistake — your content becomes invisible to AI engines and unreliably crawled by search engines.
Skipping the staging crawl. A full crawl comparison catches missing pages, broken redirects, and metadata gaps before they cost you traffic.
No rollback plan. Keep your WordPress frontend accessible (even if just at a temporary URL) for 30 days in case you need to revert.
Getting Help
Migration is one of the highest-risk operations you can perform on a site with established rankings. Our include headless migrations with full SEO preservation, and our cover pre-migration auditing and post-migration monitoring.
Talk to us about your migration for a technical assessment and risk review.
Frequently Asked Questions
How long does a WordPress to Next.js migration take?
For a standard content site, 4–8 weeks including development, testing, and launch. Complex sites with e-commerce, membership, or heavy custom functionality take 8–16 weeks.
Will I definitely lose rankings during migration?
Some short-term volatility is normal as Google re-crawls. Done correctly — with URL preservation, complete metadata transfer, and server-side rendering — most sites return to baseline within 30 days and often exceed it due to performance gains.
Can I migrate incrementally?
Yes. A common approach is migrating your blog first (lowest risk, highest performance benefit), then marketing pages, then transactional pages. This limits blast radius and lets you validate the approach.
What if my site relies heavily on plugins?
Audit your plugins first. Backend plugins (SEO, custom fields) transfer fine. Frontend-rendering plugins need rebuilding in React. If your site depends on many frontend plugins, headless may not be cost-effective — a traditional WordPress optimization might serve you better.